When it comes to repurposing bourbon barrels, the possibilities are endless. From furniture to decor, these barrels offer a unique and rustic charm that adds character to any space. In this blog post, we’ll guide you through the creative process of transforming a bourbon barrel into a stylish and functional coat rack. By combining craftsmanship with the allure of whiskey, you’ll create a stunning piece that pays homage to the rich history of bourbon.
Materials Needed:
- Bourbon barrel (preferably with the metal hoops intact)
- Saw
- Drill
- Sandpaper
- Hooks or pegs
- Mounting hardware
- Stain or paint (optional)
Step-by-Step Guide:
- Prepare the Barrel: Start by cleaning the bourbon barrel thoroughly to remove any residue or dirt. If desired, sand down the surface to smooth out imperfections and create a clean canvas for your coat rack. Remember to retain the unique markings and branding on the barrel, as they add to its charm and character.
- Determine the Length: Measure the desired length for your coat rack and mark it on the bourbon barrel. Using a saw, carefully cut along the marked line, ensuring a straight and even cut. Be cautious and use appropriate safety measures while handling the saw.
- Sand and Smooth: After cutting, sand the edges of the barrel piece to remove any roughness or splinters. Pay attention to the overall surface, sanding lightly to maintain the natural texture and patina of the wood. This step helps create a refined and polished appearance.
- Drill Holes: On the flat surface of the barrel piece, measure and mark the desired locations for the hooks or pegs. Use a drill to create holes at the marked spots, ensuring the holes are wide enough to accommodate the hooks or pegs securely. The number of holes will depend on the size and capacity of your coat rack.
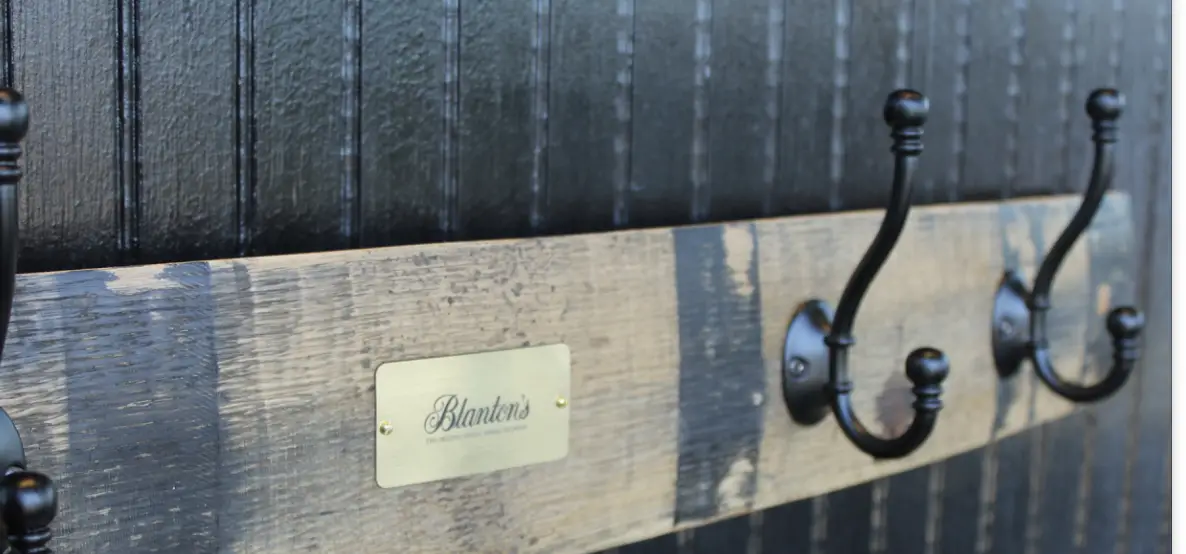
- Attach Hooks or Pegs: Insert the hooks or pegs into the drilled holes, ensuring they are securely fitted. Choose hooks or pegs that align with the aesthetic and style you envision for your coat rack. Consider options that offer durability and provide sufficient space for hanging coats, hats, and other accessories.
- Mount the Coat Rack: Determine the mounting location for your coat rack and mark the spots where you’ll attach it to the wall. Use appropriate mounting hardware, such as screws or wall anchors, to secure the coat rack firmly in place. Ensure the rack is level and stable before finalizing the installation.
- Finishing Touches (Optional): If desired, apply a coat of stain or paint to the bourbon barrel coat rack to enhance its visual appeal and protect the wood. Choose a finish that complements your decor and personal style. Consider transparent or semi-transparent finishes that allow the natural beauty of the wood to shine through.
Conclusion:
By repurposing a bourbon barrel into a coat rack, you can bring a touch of rustic elegance and whiskey heritage into your home. This DIY project combines craftsmanship, creativity, and a love for bourbon, resulting in a functional piece that celebrates the beauty of the barrel’s wood and its journey. With a bit of ingenuity and the right materials, you can transform a bourbon barrel into a stunning coat rack that serves as a conversation piece and adds character to your entryway or living space. Cheers to the fusion of style and whiskey-inspired craftsmanship!