Flaxseed Oil vs. Avocado Oil: The Ultimate Showdown for Seasoning Cast Iron

When it comes to cast iron cookware, seasoning is an essential step to create a non-stick surface, prevent rusting, and enhance the overall performance of your beloved skillet or pan. Among the numerous options available, two popular choices for seasoning are flaxseed oil and avocado oil. Both oils have their unique properties and enthusiasts, but which one is truly the best for seasoning your cast iron? In this blog post, we’ll delve into the characteristics and benefits of flaxseed oil and avocado oil to help you make an informed decision.

  1. Flaxseed Oil for Seasoning Cast Iron

Flaxseed oil, derived from flaxseeds, has been gaining popularity among cast iron enthusiasts for its ability to create a hard, slick surface that rivals traditional seasoning methods. Its high smoke point and the presence of omega-3 fatty acids make it an attractive option. When applied and baked onto the cast iron, flaxseed oil forms a polymerized layer, providing excellent non-stick properties over time.

Pros: a. Polymerization: Flaxseed oil has a unique molecular structure that lends itself to polymerization when exposed to high heat, resulting in a durable, non-stick coating on the cast iron surface. b. Hard finish: The seasoning formed by flaxseed oil tends to be harder and smoother, offering an improved cooking surface compared to other oils.

Cons: a. Tricky application: Flaxseed oil requires multiple thin coats, and uneven application may lead to a patchy finish or flaking.

  1. Avocado Oil for Seasoning Cast Iron

Avocado oil, extracted from the fruit of the avocado tree, is known for its versatility and health benefits. As a seasoning agent for cast iron, it has gained a loyal following due to its high smoke point and potential to create a smooth surface.

Pros: a. High smoke point: Avocado oil’s high smoke point ensures that it won’t break down easily during the seasoning process, making it a reliable option for achieving a consistent finish. b. Availability and affordability: Avocado oil is widely available and relatively affordable compared to other specialty oils.

Cons: a. Lack of polymerization: Unlike flaxseed oil, avocado oil does not polymerize as effectively, resulting in a less robust and potentially less non-stick seasoning layer. b. Potential for stickiness: Some users have reported that avocado oil seasoning can be tacky or sticky, especially if not applied thinly and evenly.

  1. Making the Best Choice for Your Cast Iron

Choosing between flaxseed oil and avocado oil ultimately comes down to personal preference and priorities. If you value a truly non-stick and long-lasting seasoning, flaxseed oil might be the better option. However, be prepared for a more involved seasoning process. On the other hand, if you prioritize convenience and ease of application, avocado oil can still provide satisfactory results.

Tips for Seasoning Cast Iron:

  1. Clean your cast iron thoroughly: Before seasoning, ensure your cast iron is clean and free from rust or debris.
  2. Preheat the cookware: Warm the cast iron in the oven to open up the pores of the metal for better oil absorption.
  3. Apply oil sparingly: For both oils, apply a thin layer using a lint-free cloth, paper towel, or brush to avoid excess pooling.
  4. Bake at high heat: Place the oiled cast iron upside down in the oven and bake at a high temperature to promote polymerization.

Conclusion

In the debate of flaxseed oil vs. avocado oil for seasoning cast iron, both options have their merits. Flaxseed oil offers superior non-stick properties, while avocado oil provides a convenient and accessible alternative. Ultimately, the choice depends on your preferences, cooking habits, and the time you’re willing to invest in the seasoning process. Regardless of your decision, proper seasoning will undoubtedly extend the lifespan and performance of your cherished cast iron cookware, making it a joy to cook with for years to come. Happy seasoning!

The Art of Hog Roasting: A Time-Honored Tradition for a Memorable Feast

Roasting a whole hog is a culinary experience that dates back centuries, evoking memories of festive gatherings, family reunions, and communal celebrations. The rich flavors, tender meat, and mouthwatering aroma make hog roasting an unforgettable experience. While it may seem like a daunting task, with proper preparation and some patience, you can achieve a succulent and delicious hog roast. In this blog post, we will take you through the step-by-step process of roasting a hog to perfection, ensuring a memorable feast for you and your guests.

Step 1: Choose the Right Hog:

Selecting the hog is a crucial first step. Look for a fresh, high-quality hog, preferably sourced from a reputable local farm or butcher. The size of the hog will depend on the number of guests you plan to serve, typically ranging from 50 to 150 pounds.

Step 2: Prep and Clean the Hog:

Before roasting, the hog needs thorough cleaning. Rinse the hog inside and out with cold water. Remove any excess fat or organs from the cavity and trim the skin if necessary. Pat the hog dry with paper towels.

Step 3: Seasoning the Hog:

Creating a flavorful rub is essential for a mouthwatering hog roast. You can use a combination of salt, pepper, garlic powder, paprika, brown sugar, and other preferred spices. Apply the rub generously on the inside and outside of the hog, making sure to reach all crevices and cavities.

Step 4: Prepare the Cooking Equipment:

Traditionally, hog roasting is done on a large spit or in a specially designed hog roaster. Ensure your cooking equipment is sturdy and large enough to accommodate the size of the hog. Preheat the grill or roaster to a low and consistent temperature of around 225-250°F (107-121°C).

Step 5: Secure the Hog and Start Roasting:

Insert the hog onto the spit, making sure it is evenly balanced. Truss the hog securely using butcher’s twine to prevent any loose parts from flopping during the cooking process. Place the hog on the grill or roaster and close the lid.

Step 6: Monitor and Baste:

The roasting process will take several hours, depending on the size of the hog. It is crucial to monitor the temperature and use a meat thermometer to ensure the hog reaches an internal temperature of 165°F (74°C) to ensure it is thoroughly cooked. Baste the hog with a mixture of apple cider vinegar, olive oil, and the leftover rub every hour to keep the meat moist and add extra flavor.

Step 7: Rest and Serve:

Once the hog reaches the desired internal temperature, carefully remove it from the grill or roaster, and let it rest for about 30 minutes. Carve and serve the succulent hog alongside your favorite sides and accompaniments.

Conclusion:

Roasting a whole hog is an age-old culinary tradition that brings people together for a memorable feast. By selecting the right hog, preparing it with a flavorful rub, and roasting it with care and patience, you can create a mouthwatering centerpiece that will leave a lasting impression on your guests. As you embark on this gastronomic journey, embrace the sense of community and joy that hog roasting brings, and savor the rich flavors and tender meat of this time-honored tradition.

Unveiling the Magic: What Does a Seasoned Blackstone Look Like?

For avid outdoor cooks, owning a Blackstone griddle is a game-changer. Properly seasoning your Blackstone is a crucial step in maintaining its performance and longevity. As the seasoning process unfolds, a dark and mysterious transformation occurs on the griddle’s surface. In this blog post, we will explore the magic of seasoning and reveal what a seasoned Blackstone looks like, giving you insights to recognize when your griddle is primed for the ultimate cooking experience.

The Art of Seasoning:

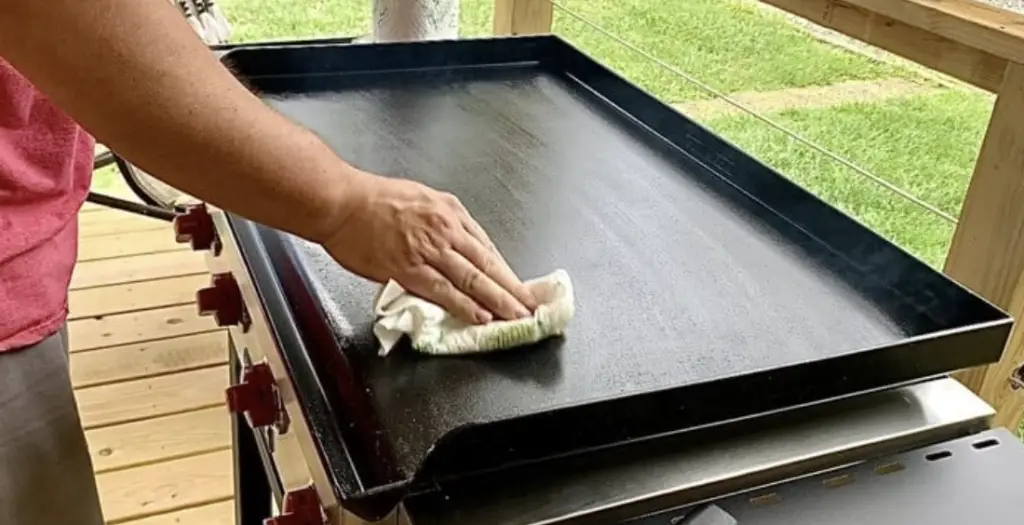
Seasoning a Blackstone griddle involves creating a thin, durable layer of polymerized oil that serves as a natural non-stick coating. This process involves multiple rounds of heating oil on the griddle’s surface, allowing it to bond with the metal, and then wiping off the excess oil.

The Initial Stages:

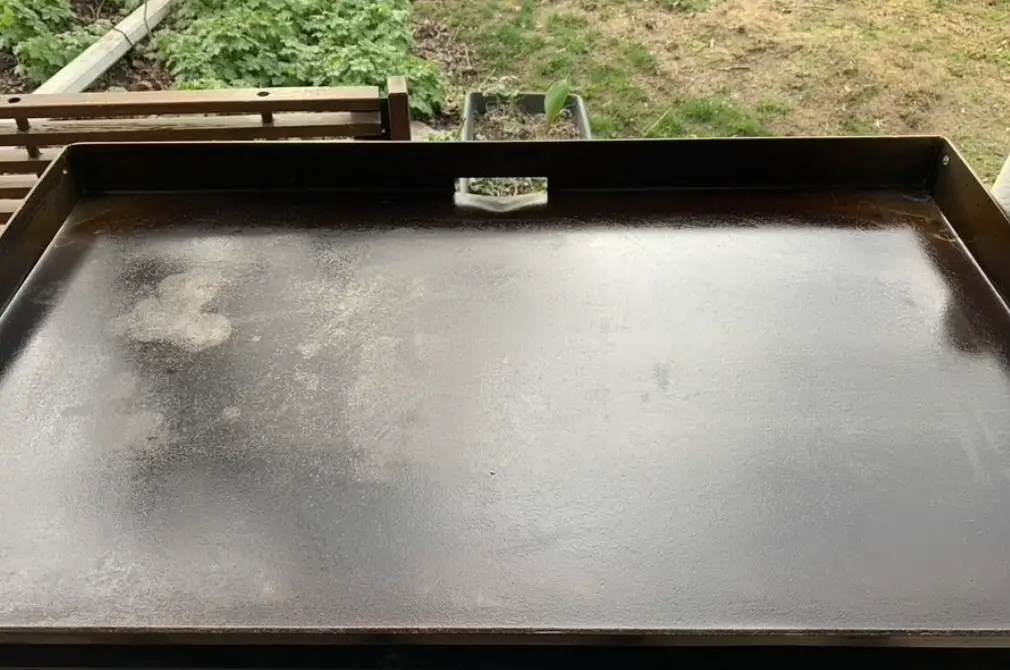
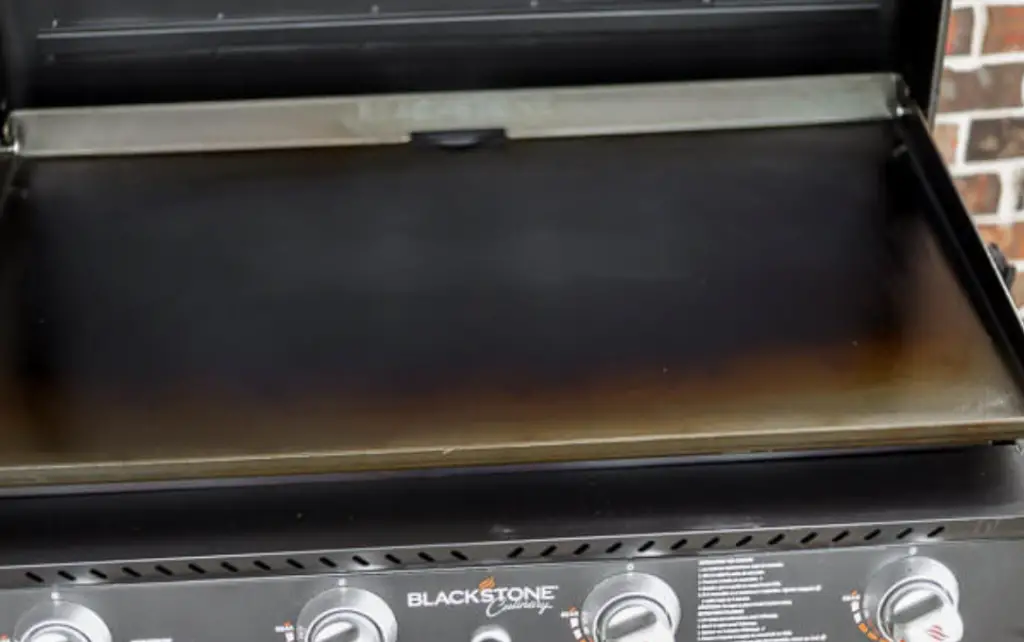
During the early stages of seasoning, you will notice a slight change in color on the griddle’s surface. It may develop a lighter hue, akin to a pale bronze or golden tint. This is the beginning of the transformation, as the oil starts to form a protective layer over the metal.

The Gradual Darkening:

As the seasoning process continues, the griddle will undergo a gradual darkening. The surface will evolve from the initial golden tint to a rich amber or deep brown shade. This darkening occurs as the oil molecules polymerize and bond to the metal, resulting in a smoother, more non-stick surface.

The Glass-like Sheen:

One of the signs of a well-seasoned Blackstone is a glossy and glass-like sheen that develops on the cooking surface. The multiple layers of polymerized oil create a smooth and reflective finish that is not only visually appealing but also enhances the griddle’s cooking performance.

The Non-Stick Test:

A seasoned Blackstone griddle will exhibit remarkable non-stick properties. Foods will glide effortlessly across the surface without sticking, making cooking and cleaning a breeze. You can test the non-stick quality by cooking eggs or delicate ingredients without the need for excessive oil or cooking spray.

The Patina Effect:

Over time, with each cooking session, your seasoned Blackstone will develop a beautiful patina effect. The patina is the accumulation of oils and cooking residues that further enhance the non-stick properties of the griddle. This prized feature adds character and charm to your griddle and is a testament to its well-seasoned status.

Conclusion:

The process of seasoning a Blackstone griddle is truly a magical experience, transforming a bare metal surface into a culinary powerhouse. As the griddle darkens and takes on a rich, glossy appearance, the true essence of a seasoned Blackstone is revealed. The non-stick quality, the patina effect, and the ease of cooking all come together to elevate your outdoor cooking adventures.

With proper care and maintenance, your seasoned Blackstone griddle will become an indispensable tool in your culinary journey, providing you with delectable meals and unforgettable memories for years to come. So, embrace the art of seasoning and enjoy the rewards of a well-seasoned Blackstone griddle. Happy cooking!

Unveiling the Truth: Can You Season Your Blackstone with Olive Oil?

Blackstone griddles have become a popular choice for outdoor cooking enthusiasts due to their versatility and exceptional performance. As with any cooking surface, seasoning your Blackstone is essential to ensure optimal cooking results and extend its lifespan. However, a debate has emerged regarding the best oil for seasoning, with olive oil being a controversial choice. In this blog post, we’ll explore the question of whether you can season your Blackstone with olive oil and provide valuable insights to help you make an informed decision.

Understanding the Purpose of Seasoning:

Before delving into the topic, let’s clarify the purpose of seasoning a griddle. Seasoning involves creating a protective layer of polymerized oil on the cooking surface. This layer prevents rust and corrosion, improves non-stick properties, and enhances the overall cooking experience.

The Truth about Olive Oil and High Smoke Points:

One of the main concerns regarding using olive oil for seasoning is its relatively low smoke point. Extra virgin olive oil, in particular, has a smoke point of around 375°F (190°C), which is lower than other oils commonly used for seasoning, like vegetable oil or flaxseed oil.

During seasoning, the oil needs to reach high temperatures to polymerize effectively. If the oil’s smoke point is too low, it can break down and create undesirable flavors and even smoke excessively during the process.

The Better Alternatives for Seasoning:

While using olive oil for seasoning can be problematic due to its low smoke point, there are alternative oils with higher smoke points that are more suitable for the task. Some of the best options include:

  1. Flaxseed Oil: Flaxseed oil has a high smoke point and contains a high amount of omega-3 fatty acids, making it an excellent choice for seasoning cast iron surfaces like the Blackstone griddle.
  2. Vegetable Oil: Vegetable oils like canola, soybean, or grapeseed oil have higher smoke points and are widely used for seasoning cast iron and steel surfaces.
  3. Shortening: Solid vegetable shortening is another popular choice for seasoning as it creates a durable and non-stick layer on the griddle surface.

Conclusion:

In summary, while olive oil may not be the best choice for seasoning your Blackstone griddle due to its relatively low smoke point, there are several better alternatives available. Opt for oils with higher smoke points, such as flaxseed oil, vegetable oil, or vegetable shortening, to ensure a successful and effective seasoning process.

Remember that the key to a well-seasoned griddle is patience and consistency. Regardless of the oil you choose, multiple rounds of seasoning, each followed by thorough heating, cooling, and wiping, will gradually build up a durable and non-stick surface that will enhance your cooking experiences for years to come. So, embrace the art of seasoning and unlock the full potential of your Blackstone griddle with the right choice of oil. Happy griddling!

Mastering the Flame: Key Features to Consider Before Buying an Offset Smoker

For passionate barbecue enthusiasts, an offset smoker is the holy grail of outdoor cooking. With the tantalizing aroma and mouthwatering flavors it imparts to your meats, this traditional cooking apparatus is a must-have for any serious pitmaster. However, choosing the perfect offset smoker can be a daunting task, as various models flood the market with different features. In this blog post, we’ll explore the most important features to look for before buying an offset smoker, helping you make an informed decision and elevate your smoking game to new heights.

  1. Construction Quality:

The first and foremost aspect to consider is the construction quality of the offset smoker. Look for models made from thick, durable steel, preferably with a gauge of at least 1/4 inch. Solid construction ensures better heat retention and distribution, which translates to more consistent cooking results. Avoid thin materials that might warp or deteriorate quickly, as they can lead to temperature fluctuations and hinder your smoking experience.

  1. Cooking Area Size:

The cooking area of an offset smoker determines how much food you can cook in a single batch. Consider the number of people you typically cook for and how much space you’ll need for larger gatherings. Keep in mind that the cooking area includes both the main cooking chamber and any additional shelves or racks. Choose an offset smoker with a cooking area that suits your needs, providing ample room for your culinary creations.

  1. Offset Design and Airflow Control:

The offset design is the heart of the smoker, defining how smoke and heat move through the cooking chamber. Opt for offset smokers with a well-designed smokestack and dampers for precise airflow control. This allows you to maintain a stable cooking temperature and adjust the smoke intensity to achieve the desired flavor profile. A model with adjustable baffles or tuning plates can help distribute heat more evenly throughout the cooking chamber, preventing hot spots.

  1. Insulation and Heat Retention:

Insulation is a crucial aspect of offset smokers, as it affects heat retention and fuel efficiency. Look for smokers with well-sealed doors, tight-fitting lids, and quality gaskets to prevent smoke and heat from escaping. Efficient insulation not only ensures steady temperatures but also saves you from constantly adding fuel during long smoking sessions.

  1. Mobility and Portability:

If you plan to use your offset smoker for tailgating, camping trips, or outdoor events, consider the smoker’s mobility and portability features. Look for models with sturdy wheels and handles for easy transportation. Foldable side shelves can be handy for saving space when not in use or during transit.

  1. Additional Features:

Some offset smokers come with extra features that can enhance your cooking experience. These may include built-in temperature gauges, storage racks, utensil hooks, and even attached fireboxes for versatility in your cooking methods. While these features aren’t essential, they can add convenience and value to your smoker.

Conclusion:

Investing in the right offset smoker can elevate your barbecue game from amateur to pitmaster status. Remember to prioritize construction quality, cooking area size, offset design, and airflow control. Adequate insulation, mobility, and additional features are also worth considering based on your preferences and intended usage. By choosing an offset smoker that ticks all the right boxes, you’ll embark on a culinary journey filled with succulent flavors and unforgettable barbecue experiences. So, go ahead and embrace the art of offset smoking, and let your passion for barbecue flourish!

Mastering the Art of Smoked Thanksgiving Turkey on Your Traeger Grill: A Step-by-Step Guide

Thanksgiving is a time of gratitude, family, and, of course, delicious food. While traditional oven-roasted turkey is always a hit, why not take your Thanksgiving feast to the next level by smoking your turkey on a Traeger Grill? The smoky flavors and tender meat will have your guests asking for seconds. In this step-by-step guide, we’ll walk you through the process of smoking a Thanksgiving turkey on your Traeger Grill, ensuring a mouthwatering centerpiece that will leave a lasting impression.

  1. Preparing the Turkey:

Start by selecting a fresh or thawed turkey of your desired size. Remove any giblets or neck from the cavity and rinse the turkey thoroughly. Pat it dry with paper towels. For extra flavor, you can brine the turkey overnight using a mixture of water, salt, sugar, and herbs.

  1. Seasoning and Prepping:

Prepare a flavorful rub by combining your favorite herbs and spices, such as garlic powder, onion powder, paprika, dried thyme, and black pepper. Generously apply the rub to the turkey, making sure to coat both the exterior and interior cavities. This will infuse the meat with delicious flavors as it smokes.

  1. Preheating and Setting Up the Grill:

Preheat your Traeger Grill to 225°F, ensuring that the pellet hopper is filled with your choice of hardwood pellets. For a classic smoky flavor, try using hickory, apple, or cherry pellets. Allow the grill to reach the desired temperature and create a consistent smoke before placing the turkey inside.

  1. Smoking the Turkey:

Place the seasoned turkey directly on the grill grates, breast side up. For added moisture and flavor, you can place a water pan underneath the turkey. Close the lid and let the Traeger work its magic. Maintain a steady temperature of around 225°F to 250°F throughout the smoking process.

  1. Monitoring and Basting:

Keep a close eye on the turkey’s internal temperature using a reliable meat thermometer. After the first few hours, baste the turkey with a mixture of melted butter and your favorite herbs. This will help keep the meat moist and add extra layers of flavor. Baste every hour or so to ensure a succulent result.

  1. Cooking Time and Temperature:

The cooking time will depend on the size of your turkey. As a general guideline, calculate approximately 30 minutes of cooking time per pound of turkey. However, it’s crucial to rely on the internal temperature for doneness. The turkey is cooked when the thickest part of the breast registers 165°F, and the thigh registers 175°F. This ensures that the meat is both safe to eat and tender.

  1. Resting and Serving:

Once the turkey reaches the desired temperature, carefully remove it from the grill and let it rest for 20 to 30 minutes. This allows the juices to redistribute and ensures a moist and flavorful turkey. Carve and serve the smoked turkey alongside your favorite Thanksgiving sides, and watch as your guests marvel at the incredible flavors.

Conclusion:

Smoking a Thanksgiving turkey on your Traeger Grill is a surefire way to elevate your holiday feast. With a combination of carefully chosen herbs, flavorful rubs, and the art of low-and-slow smoking, you can create a tender, juicy, and smoky turkey that will be the star of the Thanksgiving table. Follow these step-by-step instructions, and get ready to savor the unforgettable flavors and receive accolades for your culinary skills. Embrace the tradition of smoking your Thanksgiving turkey and create a memorable dining experience for your loved ones.

Traeger Grills Pro Series 34: The Ultimate Electric Wood Pellet Grill and Smoker Review

Disclosure: This post contains affiliate links, which means I may earn a commission from qualifying purchases made through these links at no additional cost to you.

When it comes to outdoor cooking, Traeger Grills has earned a reputation for excellence. Their innovative approach to grilling and smoking has revolutionized the way we enjoy barbecues. In this review, we delve into the features and benefits of the Traeger Grills Pro Series 34 Electric Wood Pellet Grill and Smoker. Designed to combine convenience with exceptional flavor, this grill promises an unforgettable cooking experience. Join us as we explore why the Traeger Pro Series 34 deserves its place at the top of the grilling game.

  1. Superior Flavor with Wood Pellets:

The heart and soul of Traeger grills lie in their use of wood pellets. Unlike traditional charcoal or gas grills, the Pro Series 34 utilizes 100% natural hardwood pellets, infusing your food with a rich and smoky flavor that is second to none. Whether you’re grilling steak, smoking ribs, or baking pizza, the versatility of the wood pellet system allows for a wide range of culinary possibilities. From hickory and mesquite to apple and cherry, Traeger offers a variety of wood pellet flavors to suit your taste preferences.

  1. Digital Control for Precision Cooking:

One of the standout features of the Pro Series 34 is its digital control system. With the easy-to-use interface, you can set and maintain precise cooking temperatures with the touch of a button. The grill’s temperature range spans from 180°F to 450°F, giving you the flexibility to sear, smoke, roast, and bake with accuracy. The integrated meat probe ensures your dishes are cooked to perfection, eliminating the guesswork and delivering consistent results every time. The digital control system allows you to focus on other aspects of your gathering while the grill takes care of the cooking.

  1. Ample Cooking Space and Durability:

The Traeger Pro Series 34 is designed to cater to large gatherings and parties with its generous cooking capacity. The 884 square inches of grilling space provide ample room to cook multiple racks of ribs, whole chickens, or even a Thanksgiving turkey. The grill’s sturdy construction and durable powder coat finish ensure longevity, allowing you to enjoy years of delicious barbecues with friends and family. Additionally, the grill’s versatility extends to its ability to function as both a grill and a smoker, giving you the best of both worlds in one efficient appliance.

  1. WiFIRE Technology for Ultimate Convenience:

Traeger’s Pro Series 34 takes convenience to the next level with its WiFIRE technology. By connecting the grill to your smartphone via the Traeger app, you gain full control of your cooking experience from anywhere. Adjust temperatures, set timers, monitor meat probes, and even access a vast library of recipes—all from the palm of your hand. The app also allows you to receive alerts and notifications, ensuring you never miss a beat while your meal is being prepared.

Conclusion:

The Traeger Grills Pro Series 34 Electric Wood Pellet Grill and Smoker combines innovation, superior flavor, and convenience to create an exceptional cooking experience. Whether you’re a seasoned grill master or just starting out, this grill’s user-friendly features make it accessible to everyone. From its wood pellet system to its digital control and WiFIRE technology, the Pro Series 34 sets a new standard for outdoor cooking. If you’re looking to elevate your grilling game and create unforgettable flavors, the Traeger Pro Series 34 is the perfect companion for your culinary adventure.

Wood Pellet Storage: How Long Can You Keep Them?

Wood pellets are a popular and eco-friendly fuel source for pellet stoves and grills. However, if you’ve stocked up on wood pellets or are considering purchasing in bulk, you may be wondering how long they can be safely stored without compromising their quality. In this blog post, we will delve into the question of how long wood pellets last in storage, exploring factors that can impact their lifespan and offering tips for proper storage to maximize their shelf life.

  1. Pellet Longevity: Factors to Consider

The longevity of wood pellets primarily depends on three key factors: moisture, exposure to air, and temperature. Moisture is the biggest enemy of wood pellets, as it can cause degradation, mold growth, and loss of fuel efficiency. Exposure to air can lead to oxidation, which can affect the pellets’ combustion properties. Temperature fluctuations can also impact the pellets’ moisture content and overall stability.

  1. Manufacturer’s Recommendations

To get a better understanding of the expected storage life of your specific wood pellets, it’s advisable to consult the manufacturer’s recommendations. Different brands and types of pellets may have varying guidelines for storage. Manufacturers often provide information on the ideal storage conditions and the recommended shelf life of their products. Following their recommendations will help ensure you maximize the longevity of your wood pellets.

  1. Proper Storage Conditions

To extend the storage life of wood pellets, it is crucial to store them in optimal conditions. Here are some key considerations:

a. Moisture Control: Keep wood pellets in a dry environment, away from direct contact with water or excessive humidity. Moisture can cause pellets to swell, break down, and become unusable. Use moisture-resistant storage containers, or invest in dedicated pellet storage bins that provide an airtight seal to keep moisture out.

b. Air Exposure: Minimize the pellets’ exposure to air by storing them in sealed containers or bags. Avoid leaving bags open for extended periods and seal them tightly after each use.

c. Temperature Stability: Aim to store wood pellets in a cool, dry place with stable temperatures. Extreme temperature fluctuations can lead to condensation, which may introduce moisture into the pellets. Avoid exposing pellets to direct sunlight or placing them near heat sources.

  1. Shelf Life Expectations

Under optimal storage conditions, wood pellets can typically retain their quality and efficacy for around six to twelve months. However, it is important to note that the exact shelf life can vary depending on the specific pellets and storage conditions. High-quality pellets stored in ideal conditions can potentially last even longer, while poor storage practices may reduce their lifespan.

  1. Performing a Quality Check

Before using wood pellets that have been stored for an extended period, it is advisable to perform a quality check. Look for signs of mold, excessive dust, or a foul odor, as these may indicate deterioration. Good-quality pellets should be firm, have minimal dust, and retain their original color and scent.

Conclusion:

Proper storage is essential for maintaining the quality and longevity of wood pellets. By ensuring optimal conditions—controlling moisture, minimizing air exposure, and maintaining stable temperatures—you can extend the shelf life of your wood pellets and enjoy reliable and efficient performance when using them in your pellet stove or grill. Remember to consult the manufacturer’s recommendations for specific storage guidelines, and perform periodic quality checks to ensure the pellets are in good condition before use. With diligent storage practices, you can confidently stock up on wood pellets, knowing that they will provide consistent and reliable fuel for your heating or grilling needs.

Keeping Your Pellets Dry: Why Every Traeger Owner Needs a Stay Dry Pellet Bin

Disclosure: This post contains affiliate links, which means I may earn a commission from qualifying purchases made through these links at no additional cost to you.

If you’re a proud owner of a Traeger wood pellet grill, you already know the joy of cooking delicious meals with the rich, smoky flavors that only wood pellets can provide. However, when it comes to storing your pellets, moisture can be a significant concern, affecting their performance and overall quality. That’s where the Stay Dry Pellet Bin comes in—a valuable accessory for every Traeger owner. In this blog post, we will explore the importance of keeping your pellets dry and the reasons why a Stay Dry Pellet Bin is a must-have for a seamless grilling experience.

  1. Protecting Pellet Performance:

Wood pellets, the fuel source for Traeger grills, are highly susceptible to moisture. When exposed to humidity or rain, pellets can absorb moisture, compromising their efficiency and performance. Moisture-laden pellets can result in inconsistent temperature control, decreased smoke production, and potentially affect the flavor of your food. The Stay Dry Pellet Bin provides a safeguard against moisture intrusion, ensuring that your pellets remain dry and ready to deliver optimal results each time you fire up your Traeger.

  1. Preserving Pellet Quality:

High-quality wood pellets are essential for achieving the best flavor and performance on your Traeger grill. Moisture can lead to pellet degradation, causing them to break down or become compacted. These compromised pellets may produce excessive ash, uneven combustion, and an unpleasant taste in your food. By storing your pellets in a Stay Dry Pellet Bin, you create an environment that preserves the integrity and quality of your fuel, ensuring consistent heat, clean burn, and the authentic wood-fired taste Traeger is known for.

  1. Convenience and Accessibility:

Aside from protecting your pellets, the Stay Dry Pellet Bin offers convenience and ease of use. Its spacious capacity allows you to store a substantial amount of pellets, reducing the need for frequent refills during extended grilling sessions. The bin’s sturdy construction, easy-access lid, and integrated handle make it effortless to transport and pour pellets into your grill’s hopper, saving time and effort in the grilling process. With a Stay Dry Pellet Bin, your fuel is always within reach, conveniently stored and ready for use.

  1. Aesthetics and Organization:

In addition to its functional benefits, the Stay Dry Pellet Bin contributes to a neat and organized grilling setup. Its sleek design and Traeger branding add a touch of style to your outdoor space, complementing the aesthetics of your Traeger grill. By keeping your pellets in one dedicated container, you eliminate unsightly bags and clutter, creating a visually appealing grilling environment that reflects your passion for outdoor cooking.

  1. Long-Term Investment:

Investing in a Stay Dry Pellet Bin is a wise choice for Traeger owners looking to protect their grilling investment. By maintaining the quality and performance of your wood pellets, you ensure that your Traeger grill operates at its best for years to come. The Stay Dry Pellet Bin serves as an essential accessory that prolongs the lifespan of your pellets, enhances your grilling experience, and safeguards the longevity of your Traeger grill.

Conclusion:

For Traeger owners seeking to optimize their grilling experience and protect the quality of their wood pellets, a Stay Dry Pellet Bin is an indispensable accessory. By keeping your pellets dry, you ensure consistent heat, optimal smoke production, and the authentic wood-fired flavor Traeger is renowned for. With convenience, organization, and long-term benefits, the Stay Dry Pellet Bin becomes an essential addition to your grilling arsenal. Embrace the power of dry pellets, and elevate your Traeger grilling adventures with the convenience and peace of mind provided by the Stay Dry Pellet Bin.

Unleashing the Flavor Potential: Why a Traeger Fremont Wood Pellet Grill is the Ultimate Christmas Gift for Bourbon Drinkers

Disclosure: This post contains affiliate links, which means I may earn a commission from qualifying purchases made through these links at no additional cost to you.

As the holiday season approaches, it’s time to start thinking about the perfect gifts for your loved ones. If you have a bourbon drinker on your list, why not consider something that will not only enhance their whiskey enjoyment but also open up a world of culinary possibilities? In this blog post, we’ll delve into why the Traeger Fremont Wood Pellet Grill is the ultimate Christmas present for bourbon enthusiasts, offering a unique combination of flavor, versatility, and the opportunity to elevate their culinary skills.

  1. Unlock a Symphony of Flavors: One of the fascinating aspects of bourbon is the intricate flavors and aromas it possesses. The Traeger Fremont Wood Pellet Grill takes this experience to new heights by introducing the art of wood-fired cooking. By using all-natural hardwood pellets as fuel, this grill infuses a distinct smoky essence into your food, adding depth and complexity to your culinary creations. Imagine sipping a smooth glass of bourbon while savoring perfectly seared, smoky steaks or charred vegetables, enhancing the natural flavors and creating a harmonious pairing experience.
  2. Enhance Culinary Creativity: For bourbon lovers who enjoy experimenting with flavors, the Traeger Fremont Wood Pellet Grill provides an exciting canvas for culinary exploration. With precise temperature control and versatile cooking options, including grilling, smoking, baking, roasting, and more, this grill opens up a world of possibilities. Imagine using bourbon-infused wood pellets to smoke a pork shoulder, infusing it with subtle whiskey undertones, or experimenting with bourbon glazes and marinades to create unique flavor profiles. The Traeger Fremont Wood Pellet Grill empowers bourbon drinkers to explore the art of whiskey-infused cuisine and take their culinary skills to new heights.
  3. Perfect Pairings: Bourbon is renowned for its versatility and its ability to pair beautifully with a wide range of foods. The Traeger Fremont Wood Pellet Grill allows bourbon drinkers to take their pairing game to the next level by creating delectable dishes that complement their favorite spirit. Whether it’s smoked salmon with a honey bourbon glaze, bourbon-marinated ribs, or a caramelized bourbon-infused dessert, the grill provides an opportunity to discover the perfect balance of flavors. Every bite becomes a sensory experience that harmonizes with the nuances of the bourbon, elevating the overall enjoyment.
  4. Embrace the Art of Slow Cooking: Much like the aging process of bourbon, the Traeger Fremont Wood Pellet Grill encourages the art of patience and slow cooking. It allows bourbon aficionados to embrace the leisurely process of smoking meats or slow-roasting vegetables, fostering an appreciation for the complexity and depth that time and care can bring to a dish. As the aromas fill the air and anticipation builds, the experience becomes more than just cooking—it becomes an opportunity to relax, savor the moment, and indulge in the pleasures of both bourbon and exceptional food.

Conclusion: For bourbon lovers seeking to elevate their drinking experience and explore the world of wood-fired cuisine, the Traeger Fremont Wood Pellet Grill is the perfect Christmas gift. It offers the ability to infuse foods with the rich, smoky flavors that complement bourbon beautifully, while also providing a platform for culinary creativity and exploration. With each delicious bite, bourbon drinkers will appreciate the harmonious union of flavors, embracing the art of slow cooking and savoring the joyous combination of whiskey and exceptional cuisine. This holiday season, give the gift of an elevated bourbon experience with the Traeger Fremont Wood Pellet Grill, and watch their culinary journey unfold. Cheers to a deliciously memorable Christmas!