Tender and Juicy: How to Cook Ribs on a Gas Grill in Foil

Grilling ribs is a mouthwatering culinary adventure that brings friends and family together for a delightful feast. While there are various methods to cook ribs, using a gas grill and foil is an excellent way to achieve tender, juicy, and flavorful results. In this blog post, we’ll guide you through the step-by-step process of cooking ribs on a gas grill in foil, ensuring a finger-licking experience that will leave everyone craving for more.

Choosing the Right Ribs:

Before we dive into the cooking process, it’s essential to choose the right type of ribs. Baby back ribs and spare ribs are two popular choices. Baby back ribs are leaner and smaller, while spare ribs are larger and have more fat, resulting in a richer flavor. Whichever you choose, make sure the ribs are fresh and of high quality.

Ingredients for a Tasty Rub:

A flavorful rub is the foundation of great-tasting ribs. Here’s a simple yet delicious dry rub recipe you can use:

  • 2 tablespoons brown sugar
  • 1 tablespoon paprika
  • 1 tablespoon chili powder
  • 1 tablespoon garlic powder
  • 1 tablespoon onion powder
  • 1 teaspoon cayenne pepper (adjust to your spice preference)
  • 1 teaspoon salt
  • 1 teaspoon black pepper

Step-by-Step Guide:

Step 1: Preparing the Ribs

  • Remove the membrane: On the bone side of the ribs, locate the thin, shiny membrane and use a butter knife to lift and loosen it. Then, grab the membrane with a paper towel and peel it off in one piece. Removing the membrane ensures tender ribs and allows the flavors to penetrate the meat.
  • Apply the rub: Generously coat both sides of the ribs with the dry rub, gently massaging it into the meat. Let the ribs sit with the rub for at least 30 minutes to allow the flavors to infuse.

Step 2: Preparing the Grill

  • Preheat the gas grill: Preheat your gas grill to around 225°F to 250°F. It’s crucial to maintain a low and steady temperature throughout the cooking process for tender and succulent ribs.
  • Create an indirect heat zone: Turn off one side of the gas grill’s burners or set them to low heat. Place a disposable aluminum pan with water on the cooler side. The water pan helps regulate the temperature and keeps the ribs moist during cooking.

Step 3: Foil-Wrapped Cooking

  • Wrap the ribs in foil: Lay a large sheet of heavy-duty aluminum foil on a flat surface. Place the ribs on the foil and tightly wrap them, creating a sealed packet.
  • Grill the foil-wrapped ribs: Place the foil-wrapped ribs on the cooler side of the grill, directly over the water pan. Close the grill’s lid and cook the ribs for about 2 to 2.5 hours. The low and slow cooking method ensures the meat becomes tender and flavorful.

Step 4: Unwrapping and Searing

  • Unwrap the ribs: Carefully remove the foil-wrapped ribs from the grill. Open the foil packet, being cautious of the hot steam, and place the ribs directly on the grill grates over the direct heat zone.
  • Sear the ribs: Brush the ribs with your favorite barbecue sauce and let them sear for a few minutes on each side until they develop a beautiful caramelized glaze. Keep an eye on them to avoid burning the sauce.

Step 5: Rest and Serve

  • Rest the ribs: Once the ribs are seared to perfection, remove them from the grill and let them rest for a few minutes. Resting allows the juices to redistribute, ensuring juicy and tender ribs.
  • Cut and serve: Finally, cut the ribs between the bones and serve them up hot with your favorite sides. Watch as your guests revel in the deliciousness of perfectly cooked ribs.

Conclusion: Grill Master Extraordinaire

With this simple yet effective method of cooking ribs on a gas grill in foil, you’ll become a grill master extraordinaire. The low and slow cooking process in foil helps lock in moisture and flavors, resulting in tender, succulent, and finger-licking ribs that are sure to impress your family and friends.

So, fire up the gas grill, prepare the perfect rub, and enjoy the art of grilling as you create a feast to remember. Let the tantalizing aroma and mouthwatering taste of your foil-wrapped ribs make your next barbecue a sizzling success!

Freeing the Flow: How to Unstick a Propane Tank Valve

Propane tanks are a convenient and reliable source of fuel for various applications, from grilling delicious meals to powering outdoor heaters and camping stoves. However, over time, propane tank valves can become stuck due to rust, debris, or other factors, hindering the flow of gas and causing frustration. If you find yourself facing a stubborn propane tank valve, fear not! In this blog post, we’ll provide you with a step-by-step guide on how to unstick a propane tank valve safely and effectively.

Safety First:

Before attempting to unstick a propane tank valve, prioritize safety:

  1. Ventilate the Area: Work in a well-ventilated outdoor space away from flames, sparks, or any potential sources of ignition.
  2. Turn Off All Equipment: Ensure that all connected equipment, such as grills or heaters, is turned off and disconnected from the tank.
  3. Wear Protective Gear: Put on gloves and safety goggles to protect your hands and eyes during the process.

Step-by-Step Guide:

Step 1: Position the Tank Securely

Place the propane tank on a flat and stable surface, ensuring it is stable and won’t tip over during the unstick process.

Step 2: Apply Penetrating Oil

Using a specialized penetrating oil (such as WD-40 or a similar product), spray the oil around the base of the valve where it meets the tank. Allow the oil to sit for a few minutes to penetrate and loosen any rust or debris.

Step 3: Tap Gently

Using a rubber mallet or a piece of wood, gently tap the side of the valve in an upward direction. Avoid hitting the valve too hard, as it may cause damage.

Step 4: Heat the Valve

With extreme caution and using a propane torch or a heat gun, carefully apply heat to the base of the valve. The gentle application of heat can help expand the metal slightly and aid in loosening the stuck valve. Keep the heat source moving to avoid overheating one spot.

Step 5: Use a Wrench with Leverage

If the valve remains stuck, use a wrench with an extended handle or a pipe for added leverage. Place the wrench over the valve and turn it counterclockwise with steady, gradual pressure. Avoid applying excessive force, as this may damage the valve or tank.

Step 6: Repeat if Necessary

If the valve does not budge initially, repeat the steps above, allowing more time for the penetrating oil to work its magic. Patience and persistence are key to successfully unstick the valve.

Step 7: Seek Professional Help

If, despite your efforts, the valve remains stuck, it’s time to seek professional assistance. Experienced propane tank technicians have the expertise and tools to safely address the issue and prevent any damage to the tank or valve.

Conclusion: A Smooth Flow of Propane

Unsticking a propane tank valve can be a straightforward process with the right approach and safety measures. Remember to prioritize safety, use the appropriate tools and penetrating oil, and be patient throughout the process.

By following this step-by-step guide and taking the necessary precautions, you can ensure a smooth flow of propane, allowing you to enjoy your grilling sessions, outdoor activities, and camping adventures with ease and peace of mind. Happy grilling!

The Perfect Pairing: Choosing the Best Pellets for Brisket

Brisket, the king of BBQ cuts, holds a special place in the hearts of grillmasters and barbecue enthusiasts alike. To achieve that mouthwatering smoky flavor and tender texture that brisket is known for, the type of wood pellets used in your smoker plays a crucial role. In this blog post, we’ll explore the best pellets for brisket, helping you unlock the secrets to a tantalizing brisket smoking experience.

The Art of Smoking Brisket:

Smoking brisket is an art that requires patience, skill, and the right choice of wood pellets. The right combination of flavors can elevate your brisket from good to unforgettable.

1. Mesquite Pellets:

If you prefer a strong and bold flavor profile, mesquite pellets are an excellent choice for smoking brisket. Mesquite imparts a robust and distinctive taste, adding a deep smokiness to the meat. However, due to its intensity, it’s essential to use mesquite pellets sparingly, as too much smoke can overpower the brisket’s natural flavors.

2. Hickory Pellets:

Hickory is a classic wood choice for smoking brisket, and for good reason. Its rich and balanced flavor complements the beefy taste of brisket, providing a traditional smokiness that many barbecue enthusiasts adore. Hickory pellets are a safe bet for achieving a delicious, well-rounded brisket.

3. Oak Pellets:

Oak is another popular wood choice for smoking brisket, offering a milder flavor compared to mesquite and hickory. Oak imparts a subtle smokiness, allowing the natural flavors of the brisket to shine through while still enhancing the overall taste.

4. Pecan Pellets:

Pecan pellets strike a harmonious balance between hickory and fruit woods. With a slightly sweet and nutty flavor, pecan pellets add a unique twist to brisket, giving it a delightful complexity that will impress your taste buds.

5. Fruitwood Pellets (Apple, Cherry, or Peach):

Fruitwood pellets bring a touch of sweetness and fruitiness to your brisket. Apple, cherry, and peach wood pellets are popular choices for their mild and pleasant flavors. They add a subtle sweetness to the meat, resulting in a beautifully balanced brisket with a hint of fruit undertones.

6. Maple Pellets:

Maple pellets offer a delicate smokiness with a touch of sweetness, making them a versatile option for smoking brisket. They add a gentle flavor profile, perfect for those who prefer a more subtle smokiness.

Conclusion: Tailoring the Flavor to Your Preference

The choice of wood pellets for smoking brisket is a personal one, as it allows you to tailor the flavor profile to your preference. Each type of wood imparts a unique taste to the meat, making the selection process an exciting part of your barbecue journey.

To find your perfect pairing, consider experimenting with different wood pellets to discover the flavors that resonate with you. Whether you crave the robustness of mesquite, the classic taste of hickory, or the subtle sweetness of fruitwoods, the best pellets for brisket are the ones that bring out the flavors you love and create an unforgettable BBQ experience.

So, fire up your smoker, select your favorite wood pellets, and prepare for a delicious brisket smoking adventure. With the right pellets and a little bit of passion, you’ll soon be savoring the delectable taste of perfectly smoked brisket, earning the admiration of friends and family with your barbecue prowess. Happy smoking!

Savor the Flavor: How to Choose the Best Pellet Grill for the Summer

As the warm breeze and longer days beckon us outdoors, summer becomes the perfect season to fire up the grill and enjoy delicious barbecues with family and friends. If you’re looking to elevate your grilling game this summer, a pellet grill might be the answer. With their versatility, convenience, and mouthwatering results, pellet grills have gained popularity among grill enthusiasts. In this blog post, we’ll guide you through the process of choosing the best pellet grill to make this summer a sizzling success.

1. Consider Your Cooking Needs

Before diving into the world of pellet grills, take a moment to assess your cooking needs. Are you an occasional griller, a weekend barbecue warrior, or a seasoned pitmaster? Understanding your cooking habits and the amount of food you’ll be grilling can help determine the size and features you require in a pellet grill.

2. Temperature Range and Consistency

A crucial factor in pellet grills is their temperature range and consistency. Look for a grill with a wide temperature range, allowing you to sear at high temperatures and smoke at lower ones. Additionally, check for features like a precise temperature control system and even heat distribution to ensure your grill maintains a steady temperature throughout the cooking process.

3. Hopper Capacity and Pellet Consumption

The hopper capacity is essential as it determines how long you can cook without refilling pellets. Larger hoppers are preferable for longer cooking sessions, while smaller ones may suit occasional grilling. Additionally, consider the pellet consumption rate to estimate how much fuel you’ll need for various cooking endeavors.

4. Versatility and Additional Cooking Features

Some pellet grills offer additional cooking features that can enhance your culinary repertoire. Look for grills with the ability to bake, roast, grill, smoke, and even barbecue. Additional features like side shelves, storage space, and easy-to-use controls can also add convenience to your grilling experience.

5. Construction and Durability

A well-built pellet grill can withstand the elements and provide years of reliable performance. Look for grills made from high-quality materials such as stainless steel or durable powder-coated steel. Check for features like sturdy wheels, robust handles, and a solid construction that can handle frequent use.

6. Cleaning and Maintenance

Easy cleaning and maintenance can make a significant difference in your grilling experience. Look for grills with removable grease trays, easy-to-clean grates, and ash disposal systems that make cleanup a breeze.

7. Budget Considerations

As with any purchase, consider your budget when choosing a pellet grill. Pellet grills come in a wide range of prices, so you can find a model that suits your budget while still delivering excellent performance and features.

8. Reviews and Recommendations

Take advantage of online reviews and recommendations from friends or family who own pellet grills. Learning from others’ experiences can give you valuable insights into the best pellet grills on the market and help you make an informed decision.

Conclusion: Unleash Your Inner Grill Master

Choosing the best pellet grill for the summer is a decision that can elevate your grilling game and add a burst of flavor to your outdoor cooking adventures. By considering your cooking needs, temperature control, versatility, and other key factors, you’ll be well on your way to selecting the perfect pellet grill for your backyard.

With the right pellet grill by your side, you can unleash your inner grill master and delight in the art of outdoor cooking. So, gather your favorite recipes, invite your loved ones, and get ready to savor the flavor of a summer filled with mouthwatering barbecues and memorable moments around the grill. Happy grilling!

Savoring Perfection: How to Cook a Mouthwatering Filet Mignon on Your Blackstone Griddle

Filet mignon, renowned for its tender texture and melt-in-your-mouth flavor, is a cut of beef that promises a luxurious dining experience. When it comes to cooking this delectable steak, the Blackstone griddle proves to be a fantastic choice, providing even heat distribution and a flat surface to achieve the perfect sear. In this blog post, we’ll guide you through the steps to cook a mouthwatering filet mignon on your Blackstone griddle, ensuring a culinary masterpiece that will delight your taste buds.

Step 1: Selecting the Right Cut

Begin your filet mignon journey by selecting high-quality cuts from your local butcher or grocery store. Look for well-marbled, USDA Prime or Choice grade filet mignon, as this ensures optimal tenderness and flavor.

Step 2: Preparing the Filet Mignon

Remove the filet mignon from the refrigerator about 30 minutes before cooking to allow it to reach room temperature. This ensures even cooking throughout the steak. Pat the meat dry with paper towels to ensure a perfect sear.

Step 3: Seasoning the Steak

Keep the seasoning simple to let the natural flavors of the filet mignon shine through. Generously season both sides of the steak with kosher salt and freshly ground black pepper. For an extra layer of flavor, you can add a touch of garlic powder or your favorite steak seasoning.

Step 4: Preheating the Blackstone Griddle

Preheat your Blackstone griddle over medium-high heat until it reaches around 400-450°F (204-232°C). The hot griddle ensures a beautiful sear on the filet mignon while locking in its juices.

Step 5: Cooking the Filet Mignon

Place the seasoned filet mignon on the preheated griddle. Let it cook undisturbed for about 4-5 minutes on each side for medium-rare doneness. Adjust the cooking time according to your desired level of doneness:

  • Medium-Rare: 4-5 minutes per side (Internal temperature: 130-135°F or 54-57°C)
  • Medium: 6-7 minutes per side (Internal temperature: 140-145°F or 60-63°C)
  • Medium-Well: 8-9 minutes per side (Internal temperature: 150-155°F or 66-68°C)

Step 6: Resting the Filet Mignon

Once the filet mignon reaches your preferred doneness, remove it from the griddle and let it rest for a few minutes. Resting allows the juices to redistribute within the steak, resulting in a tender and succulent final dish.

Step 7: Savoring the Delight

Now comes the moment you’ve been waiting for – savoring the perfectly cooked filet mignon! Slice the steak against the grain to reveal its tender texture. Pair it with your favorite sides, such as garlic mashed potatoes, sautéed vegetables, or a fresh green salad, to create a complete and satisfying meal.

Conclusion: A Blackstone Griddle Delight

Cooking a filet mignon on your Blackstone griddle is a culinary delight that promises to impress your guests or provide a memorable meal for a special occasion. With a few simple steps and the right technique, you can achieve a perfectly cooked filet mignon that will elevate your dining experience to new heights. So, fire up your Blackstone griddle, get those beautiful grill marks, and savor the indulgence of a perfectly cooked filet mignon. Happy griddling!

Restoring the Shine: How to Remove Rust from Your Blackstone Griddle

A Blackstone griddle is a versatile and beloved cooking companion for outdoor enthusiasts, providing delicious meals and memorable gatherings. However, as with any outdoor cooking equipment, exposure to the elements and humidity can sometimes lead to rust forming on the griddle’s surface. But fear not! With the right tools and techniques, you can easily restore the shine to your Blackstone griddle and keep it looking as good as new. In this blog post, we’ll walk you through the step-by-step process of removing rust from your Blackstone griddle.

Materials You’ll Need:

  1. White Vinegar: A mild acid that helps dissolve rust and stains.
  2. Water: For rinsing and diluting the vinegar.
  3. Baking Soda: An effective and natural abrasive for scrubbing.
  4. Scrubbing Pads or Brushes: Soft scrubbing pads or brushes that won’t scratch the griddle surface.
  5. Paper Towels or Cloth: For wiping and drying.
  6. Vegetable Oil or Cooking Spray: To re-season the griddle after cleaning.

Step 1: Safety First

Before you begin the rust removal process, ensure your Blackstone griddle is entirely cool. Safety is paramount, so avoid working on a hot griddle to prevent any risk of burns.

Step 2: Create a Vinegar Solution

In a container, mix equal parts of white vinegar and water. This solution acts as a natural rust remover without causing damage to the griddle’s surface.

Step 3: Apply the Vinegar Solution

Using a cloth or sponge, soak it in the vinegar solution and gently rub the rusted areas on the griddle. Let the vinegar solution sit on the rust for about 5-10 minutes to allow it to work its magic.

Step 4: Scrub Away the Rust

After the vinegar solution has had time to work, use a soft scrubbing pad or brush to gently scrub away the rust. For tougher rust spots, you can sprinkle a little baking soda on the scrubbing pad and use it as an abrasive to aid in the removal process. Be gentle to avoid scratching the griddle surface.

Step 5: Rinse and Dry

Once you’ve successfully removed the rust, rinse the griddle surface thoroughly with water to remove any remaining vinegar or baking soda residue. Use paper towels or a clean cloth to dry the griddle completely.

Step 6: Re-season the Griddle

Rust removal can strip away the seasoning on your griddle. To protect it from future rust and restore its non-stick properties, apply a thin layer of vegetable oil or cooking spray all over the griddle surface. Heat the griddle for a few minutes to help the oil bond to the surface and create a protective layer.

Step 7: Regular Maintenance

To prevent rust from returning, it’s essential to perform regular maintenance on your Blackstone griddle. After each use, clean the griddle with a mild soap and water solution and ensure it’s completely dry before storing it in a dry, covered area.

Conclusion: A Shiny and Rust-Free Griddle Awaits

Removing rust from your Blackstone griddle is a straightforward and rewarding process. With a little bit of elbow grease and the right materials, you can restore your griddle to its former glory and continue enjoying countless delicious meals with family and friends. Remember to maintain your griddle regularly and keep it protected from the elements to ensure its longevity and performance for years to come. So, get ready to shine up your Blackstone griddle and embark on new culinary adventures! Happy griddling!

Can You Put a Pot on a Blackstone Griddle? Exploring the Possibilities

Blackstone griddles have gained immense popularity among outdoor cooking enthusiasts for their versatility, portability, and ability to deliver delicious grilled meals. While they are primarily designed for cooking various meats, vegetables, and other grilled delights, you might wonder whether you can take your outdoor cooking to the next level and use a pot on a Blackstone griddle. In this blog post, we’ll explore the possibilities and considerations of using pots on a Blackstone griddle.

The Beauty of Blackstone Griddles: A Brief Overview

Before we dive into the use of pots on a Blackstone griddle, let’s take a moment to appreciate why these flat-top griddles have become a favorite among grillmasters.

1. Large Cooking Surface: Blackstone griddles come with ample cooking space, providing the perfect canvas for preparing multiple items simultaneously.

2. Even Heat Distribution: The griddle’s flat-top design ensures even heat distribution, making it ideal for cooking delicate foods that might fall through the grates of a traditional grill.

3. Versatility: From breakfast classics like pancakes and eggs to lunch and dinner favorites, including burgers, stir-fries, and fajitas, a Blackstone griddle can handle a wide range of dishes.

Using a Pot on a Blackstone Griddle: Can You Do It?

The short answer is yes; you can use a pot on a Blackstone griddle. The flat and sturdy surface of the griddle makes it suitable for supporting pots and pans while cooking. However, there are some essential considerations to keep in mind to ensure a safe and enjoyable cooking experience.

1. Size Matters: When choosing a pot or pan to use on a Blackstone griddle, consider the size of the cooking surface. Ensure that the pot fits comfortably on the griddle without hanging over the edges, which could create a safety hazard.

2. Stability: Stability is crucial when using pots on a griddle. Make sure the pot has a flat and sturdy bottom to prevent tipping or spilling.

3. Heat Distribution: Since Blackstone griddles offer even heat distribution, your pots and pans should also have a flat bottom to ensure efficient and uniform cooking.

4. Griddle Material: Some Blackstone griddles come with removable grates, allowing direct flame contact for cooking. If you have such a model, be cautious when using pots directly on the grates, as they might get too hot.

What Can You Cook in a Pot on a Blackstone Griddle?

Using a pot on a Blackstone griddle opens up a world of culinary possibilities beyond what you can typically achieve on a grill. Here are some ideas to get your creative juices flowing:

1. Soups and Stews: Prepare hearty soups or stews right on the griddle for a flavorful outdoor cooking experience.

2. Stir-Fries: Whip up delicious stir-fried vegetables and proteins on the griddle for a quick and tasty meal.

3. Pasta Dishes: Cook pasta al dente on the griddle while preparing your favorite sauces to toss together for a delightful pasta dish.

4. Griddle Sautéed Vegetables: Sauté mushrooms, bell peppers, onions, and more in a pot on the griddle for a scrumptious side dish.

5. Boiled Corn on the Cob: Boil corn on the cob in a pot on the griddle for a fantastic BBQ accompaniment.

Conclusion: Expanding Your Griddle Horizons

In conclusion, you can indeed put a pot on a Blackstone griddle and elevate your outdoor cooking game. With the right considerations in mind, using pots and pans on the griddle opens up a wide range of culinary possibilities, allowing you to cook an array of delicious dishes beyond traditional grilling.

So, next time you fire up your Blackstone griddle, don’t be afraid to experiment with pots and pans, and let your creativity shine as you create mouthwatering meals for yourself and your guests. Happy griddling!

Flaxseed Oil vs. Avocado Oil: The Ultimate Showdown for Seasoning Cast Iron

When it comes to cast iron cookware, seasoning is an essential step to create a non-stick surface, prevent rusting, and enhance the overall performance of your beloved skillet or pan. Among the numerous options available, two popular choices for seasoning are flaxseed oil and avocado oil. Both oils have their unique properties and enthusiasts, but which one is truly the best for seasoning your cast iron? In this blog post, we’ll delve into the characteristics and benefits of flaxseed oil and avocado oil to help you make an informed decision.

  1. Flaxseed Oil for Seasoning Cast Iron

Flaxseed oil, derived from flaxseeds, has been gaining popularity among cast iron enthusiasts for its ability to create a hard, slick surface that rivals traditional seasoning methods. Its high smoke point and the presence of omega-3 fatty acids make it an attractive option. When applied and baked onto the cast iron, flaxseed oil forms a polymerized layer, providing excellent non-stick properties over time.

Pros: a. Polymerization: Flaxseed oil has a unique molecular structure that lends itself to polymerization when exposed to high heat, resulting in a durable, non-stick coating on the cast iron surface. b. Hard finish: The seasoning formed by flaxseed oil tends to be harder and smoother, offering an improved cooking surface compared to other oils.

Cons: a. Tricky application: Flaxseed oil requires multiple thin coats, and uneven application may lead to a patchy finish or flaking.

  1. Avocado Oil for Seasoning Cast Iron

Avocado oil, extracted from the fruit of the avocado tree, is known for its versatility and health benefits. As a seasoning agent for cast iron, it has gained a loyal following due to its high smoke point and potential to create a smooth surface.

Pros: a. High smoke point: Avocado oil’s high smoke point ensures that it won’t break down easily during the seasoning process, making it a reliable option for achieving a consistent finish. b. Availability and affordability: Avocado oil is widely available and relatively affordable compared to other specialty oils.

Cons: a. Lack of polymerization: Unlike flaxseed oil, avocado oil does not polymerize as effectively, resulting in a less robust and potentially less non-stick seasoning layer. b. Potential for stickiness: Some users have reported that avocado oil seasoning can be tacky or sticky, especially if not applied thinly and evenly.

  1. Making the Best Choice for Your Cast Iron

Choosing between flaxseed oil and avocado oil ultimately comes down to personal preference and priorities. If you value a truly non-stick and long-lasting seasoning, flaxseed oil might be the better option. However, be prepared for a more involved seasoning process. On the other hand, if you prioritize convenience and ease of application, avocado oil can still provide satisfactory results.

Tips for Seasoning Cast Iron:

  1. Clean your cast iron thoroughly: Before seasoning, ensure your cast iron is clean and free from rust or debris.
  2. Preheat the cookware: Warm the cast iron in the oven to open up the pores of the metal for better oil absorption.
  3. Apply oil sparingly: For both oils, apply a thin layer using a lint-free cloth, paper towel, or brush to avoid excess pooling.
  4. Bake at high heat: Place the oiled cast iron upside down in the oven and bake at a high temperature to promote polymerization.

Conclusion

In the debate of flaxseed oil vs. avocado oil for seasoning cast iron, both options have their merits. Flaxseed oil offers superior non-stick properties, while avocado oil provides a convenient and accessible alternative. Ultimately, the choice depends on your preferences, cooking habits, and the time you’re willing to invest in the seasoning process. Regardless of your decision, proper seasoning will undoubtedly extend the lifespan and performance of your cherished cast iron cookware, making it a joy to cook with for years to come. Happy seasoning!

The Art of Hog Roasting: A Time-Honored Tradition for a Memorable Feast

Roasting a whole hog is a culinary experience that dates back centuries, evoking memories of festive gatherings, family reunions, and communal celebrations. The rich flavors, tender meat, and mouthwatering aroma make hog roasting an unforgettable experience. While it may seem like a daunting task, with proper preparation and some patience, you can achieve a succulent and delicious hog roast. In this blog post, we will take you through the step-by-step process of roasting a hog to perfection, ensuring a memorable feast for you and your guests.

Step 1: Choose the Right Hog:

Selecting the hog is a crucial first step. Look for a fresh, high-quality hog, preferably sourced from a reputable local farm or butcher. The size of the hog will depend on the number of guests you plan to serve, typically ranging from 50 to 150 pounds.

Step 2: Prep and Clean the Hog:

Before roasting, the hog needs thorough cleaning. Rinse the hog inside and out with cold water. Remove any excess fat or organs from the cavity and trim the skin if necessary. Pat the hog dry with paper towels.

Step 3: Seasoning the Hog:

Creating a flavorful rub is essential for a mouthwatering hog roast. You can use a combination of salt, pepper, garlic powder, paprika, brown sugar, and other preferred spices. Apply the rub generously on the inside and outside of the hog, making sure to reach all crevices and cavities.

Step 4: Prepare the Cooking Equipment:

Traditionally, hog roasting is done on a large spit or in a specially designed hog roaster. Ensure your cooking equipment is sturdy and large enough to accommodate the size of the hog. Preheat the grill or roaster to a low and consistent temperature of around 225-250°F (107-121°C).

Step 5: Secure the Hog and Start Roasting:

Insert the hog onto the spit, making sure it is evenly balanced. Truss the hog securely using butcher’s twine to prevent any loose parts from flopping during the cooking process. Place the hog on the grill or roaster and close the lid.

Step 6: Monitor and Baste:

The roasting process will take several hours, depending on the size of the hog. It is crucial to monitor the temperature and use a meat thermometer to ensure the hog reaches an internal temperature of 165°F (74°C) to ensure it is thoroughly cooked. Baste the hog with a mixture of apple cider vinegar, olive oil, and the leftover rub every hour to keep the meat moist and add extra flavor.

Step 7: Rest and Serve:

Once the hog reaches the desired internal temperature, carefully remove it from the grill or roaster, and let it rest for about 30 minutes. Carve and serve the succulent hog alongside your favorite sides and accompaniments.

Conclusion:

Roasting a whole hog is an age-old culinary tradition that brings people together for a memorable feast. By selecting the right hog, preparing it with a flavorful rub, and roasting it with care and patience, you can create a mouthwatering centerpiece that will leave a lasting impression on your guests. As you embark on this gastronomic journey, embrace the sense of community and joy that hog roasting brings, and savor the rich flavors and tender meat of this time-honored tradition.

Unveiling the Magic: What Does a Seasoned Blackstone Look Like?

For avid outdoor cooks, owning a Blackstone griddle is a game-changer. Properly seasoning your Blackstone is a crucial step in maintaining its performance and longevity. As the seasoning process unfolds, a dark and mysterious transformation occurs on the griddle’s surface. In this blog post, we will explore the magic of seasoning and reveal what a seasoned Blackstone looks like, giving you insights to recognize when your griddle is primed for the ultimate cooking experience.

The Art of Seasoning:

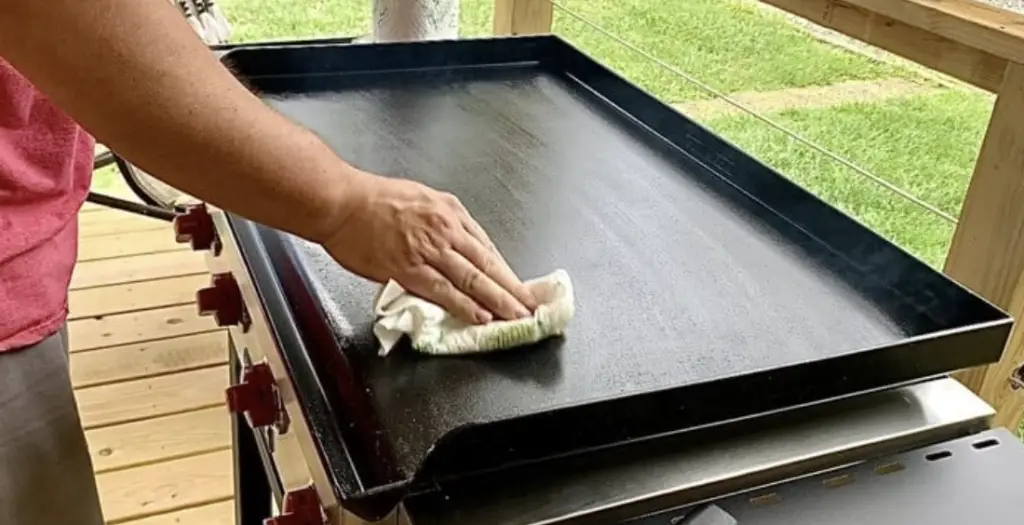
Seasoning a Blackstone griddle involves creating a thin, durable layer of polymerized oil that serves as a natural non-stick coating. This process involves multiple rounds of heating oil on the griddle’s surface, allowing it to bond with the metal, and then wiping off the excess oil.

The Initial Stages:

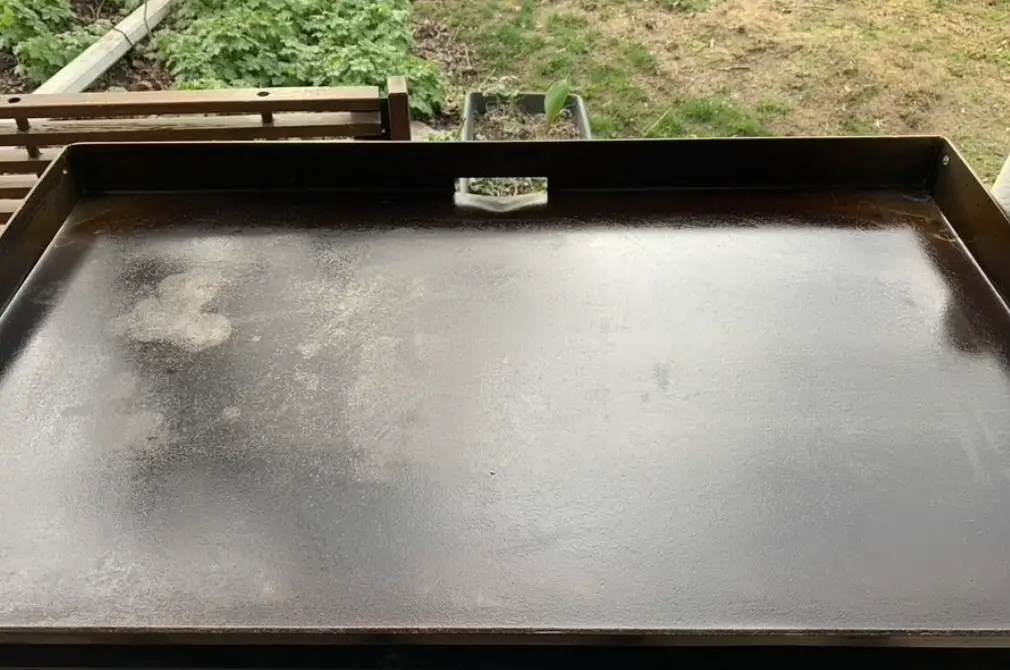
During the early stages of seasoning, you will notice a slight change in color on the griddle’s surface. It may develop a lighter hue, akin to a pale bronze or golden tint. This is the beginning of the transformation, as the oil starts to form a protective layer over the metal.

The Gradual Darkening:

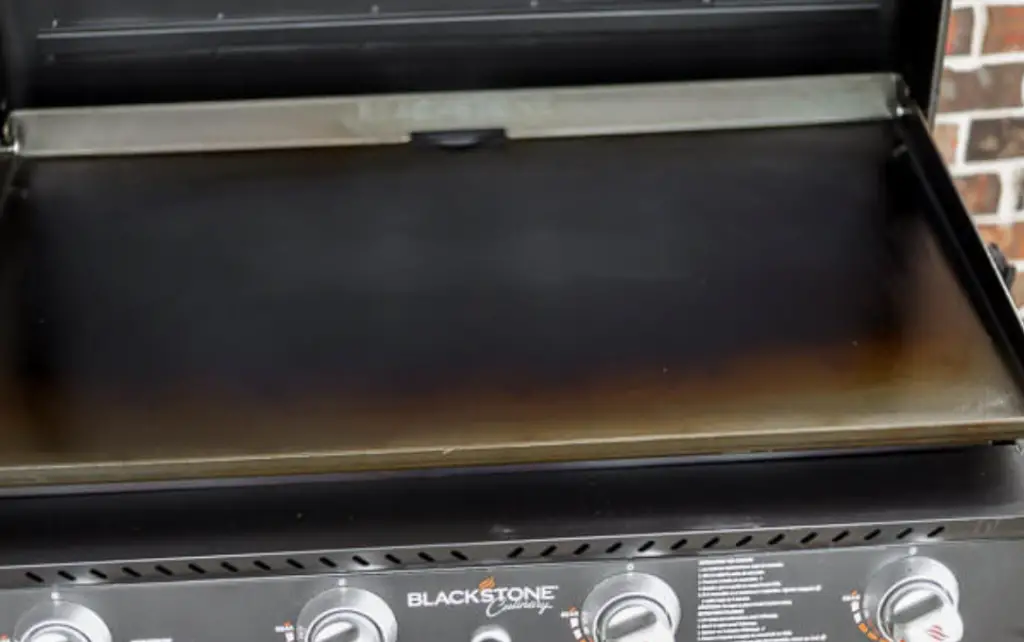
As the seasoning process continues, the griddle will undergo a gradual darkening. The surface will evolve from the initial golden tint to a rich amber or deep brown shade. This darkening occurs as the oil molecules polymerize and bond to the metal, resulting in a smoother, more non-stick surface.

The Glass-like Sheen:

One of the signs of a well-seasoned Blackstone is a glossy and glass-like sheen that develops on the cooking surface. The multiple layers of polymerized oil create a smooth and reflective finish that is not only visually appealing but also enhances the griddle’s cooking performance.

The Non-Stick Test:

A seasoned Blackstone griddle will exhibit remarkable non-stick properties. Foods will glide effortlessly across the surface without sticking, making cooking and cleaning a breeze. You can test the non-stick quality by cooking eggs or delicate ingredients without the need for excessive oil or cooking spray.

The Patina Effect:

Over time, with each cooking session, your seasoned Blackstone will develop a beautiful patina effect. The patina is the accumulation of oils and cooking residues that further enhance the non-stick properties of the griddle. This prized feature adds character and charm to your griddle and is a testament to its well-seasoned status.

Conclusion:

The process of seasoning a Blackstone griddle is truly a magical experience, transforming a bare metal surface into a culinary powerhouse. As the griddle darkens and takes on a rich, glossy appearance, the true essence of a seasoned Blackstone is revealed. The non-stick quality, the patina effect, and the ease of cooking all come together to elevate your outdoor cooking adventures.

With proper care and maintenance, your seasoned Blackstone griddle will become an indispensable tool in your culinary journey, providing you with delectable meals and unforgettable memories for years to come. So, embrace the art of seasoning and enjoy the rewards of a well-seasoned Blackstone griddle. Happy cooking!