Grill Master’s Guide: How to Safely Connect a Natural Gas Line to Your Grill
For avid grill enthusiasts, a natural gas connection to your grill can be a game-changer. Say goodbye to the hassle of propane tank refills and hello to uninterrupted grilling sessions. While connecting a natural gas line to your grill may seem daunting, with the right steps and precautions, you can enjoy the convenience and benefits of a permanent fuel source for your outdoor culinary adventures. In this blog post, we’ll provide a step-by-step guide on how to safely connect a natural gas line to your grill.
Important Safety Precautions:
Before diving into the process, it’s crucial to emphasize safety when working with natural gas. If you’re not comfortable or familiar with gas connections, it’s best to seek the assistance of a qualified professional, such as a licensed plumber or gas technician. Additionally, check local building codes and regulations to ensure compliance with all requirements.
Step-by-Step Guide:
1. Check Your Grill Compatibility:
Ensure that your grill is compatible with a natural gas conversion. Some grills are designed to work with either propane or natural gas, while others may require specific conversion kits.
2. Gather the Necessary Equipment:
You’ll need the following equipment to complete the connection:
- Natural gas hose or pipe
- Natural gas shutoff valve
- Pipe wrench
- Pipe joint compound or gas-rated Teflon tape
- Adjustable wrench
- Screwdriver
- Soap and water solution for leak detection
3. Locate a Natural Gas Source:
Identify a natural gas source near your grilling area. This may be a pre-existing natural gas line or one installed specifically for the grill.
4. Install the Natural Gas Shutoff Valve:
Install a natural gas shutoff valve between the gas source and the connection point for the grill. This valve will allow you to turn off the gas supply when the grill is not in use.
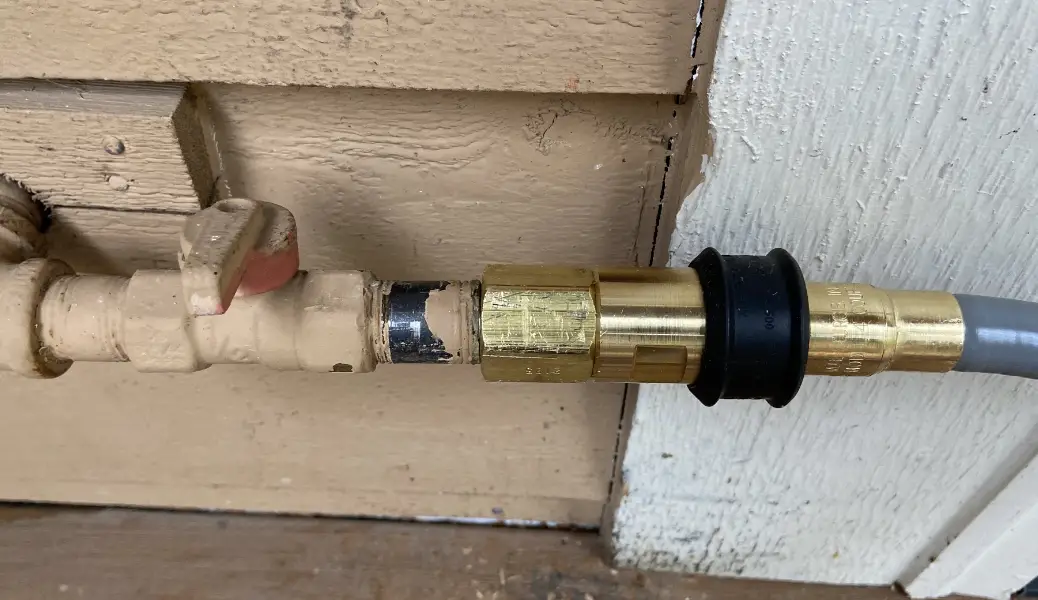
5. Connect the Natural Gas Hose or Pipe:
Attach the natural gas hose or pipe to the shutoff valve on one end and the grill’s gas inlet on the other end. Use the appropriate fittings and follow the manufacturer’s instructions for a secure connection.
6. Apply Pipe Joint Compound or Gas-Rated Teflon Tape:
Apply a small amount of pipe joint compound or wrap gas-rated Teflon tape around the threads of the fittings to create a tight seal. This step is essential to prevent gas leaks.
7. Tighten the Connections:
Use a pipe wrench to tighten the connections securely. Be cautious not to overtighten, as this may damage the fittings.
8. Perform a Leak Test:
Before using the grill, perform a leak test to ensure there are no gas leaks. Apply a soap and water solution to all the connections and watch for bubbles. If bubbles appear, there is a gas leak, and you should immediately turn off the gas and recheck the connections.
9. Check for Proper Gas Flow:
After ensuring there are no gas leaks, turn on the gas supply and check if there is proper gas flow to the grill burners. Ignite the burners and observe the flame to ensure they are working correctly.
10. Enjoy Grilling with Natural Gas:
Once you have successfully connected the natural gas line to your grill and ensured its safety, you can now enjoy the convenience and uninterrupted grilling experience that natural gas provides.
Conclusion:
Connecting a natural gas line to your grill requires careful attention to safety and following the appropriate steps. When done correctly, it opens up a world of convenience and enjoyment for your outdoor cooking endeavors. Remember, if you’re unsure about the process or lack experience with gas connections, it’s best to seek the assistance of a qualified professional. With a safe and secure natural gas connection, you’ll be well on your way to mastering the art of grilling and creating delicious meals for family and friends in your outdoor kitchen haven. Happy grilling!