Mastering the Art of Reshafting Golf Clubs: A Step-by-Step Guide
Golf clubs are more than just tools; they are extensions of a golfer’s skill and style. Over time, wear and tear or a desire for improved performance might prompt you to consider reshafting your golf club. While the idea of reshafting might seem daunting, with the right tools, materials, and a methodical approach, you can embark on this rewarding DIY project. In this blog post, we’ll guide you through the process of reshafting a golf club, helping you breathe new life into your trusted equipment.
Gathering the Essentials:
Before you start the reshafting process, ensure you have the following tools and materials at hand:
- New Shaft: Choose a shaft that suits your swing speed, playing style, and clubhead.
- Grip: Decide whether you’ll reuse the existing grip or replace it with a new one.
- Shaft Extractor: Used to remove the old shaft from the clubhead.
- Vice and Soft Jaws: A vice securely holds the club while you work. Soft jaws prevent damage to the clubhead.
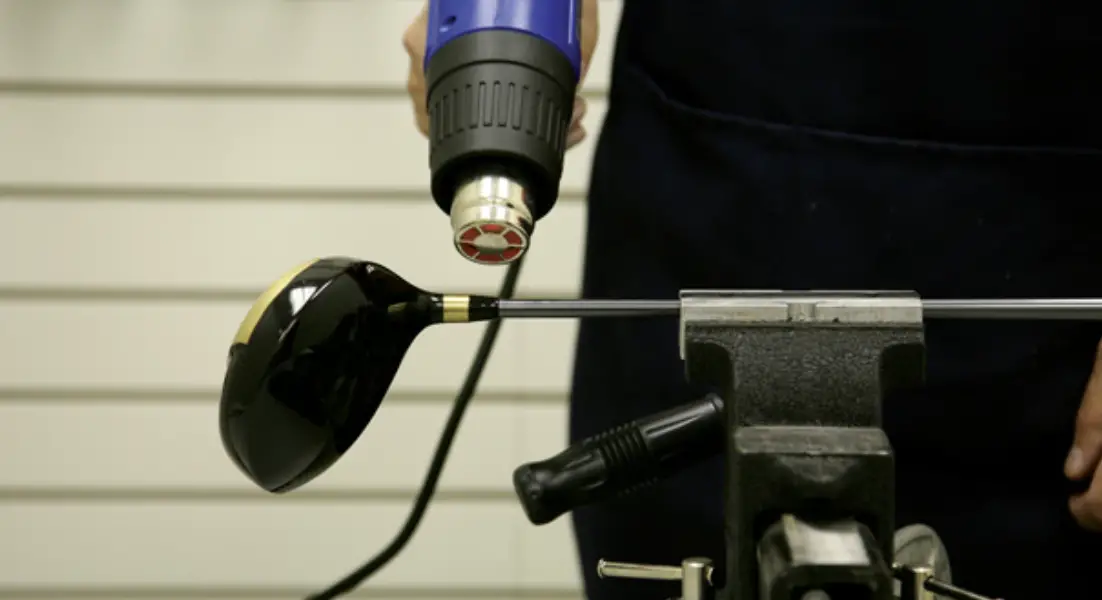
- Heat Gun: Required for activating the adhesive tape.
- Epoxy: High-quality epoxy is essential for securing the new shaft to the clubhead.
- Ferrule: The ferrule is a small ring that sits between the clubhead and the hosel.
- Solvent: Used to remove the old grip, if needed.
Step-by-Step Reshafting Process:
- Secure the Club in a Vice: Gently place the club in the vice with soft jaws, ensuring the clubhead is stabilized.
- Extract the Old Shaft: Use a shaft extractor to remove the old shaft from the clubhead. Apply heat using a heat gun to soften the epoxy. Carefully twist and pull the shaft until it’s free.
- Clean the Hosel: Remove any remaining epoxy from the hosel using a solvent and a wire brush.
- Prep the Shaft: Trim the new shaft to the desired length, ensuring it matches the original shaft’s specifications. Apply epoxy to the tip of the shaft.
- Attach the Ferrule: Slide the ferrule onto the shaft, making sure it sits snugly against the hosel.
- Insert the Shaft: Insert the prepared shaft into the hosel, ensuring it’s aligned properly. Twist the shaft slightly as you push it in to evenly distribute the epoxy.
- Secure in Vice: Clamp the club in the vice, making sure the shaft is correctly oriented.
- Let Epoxy Cure: Allow the epoxy to cure according to the manufacturer’s instructions. This typically takes several hours.
- Attach the Grip: If you’re reusing the old grip, carefully remove it using a solvent. Slide the grip onto the shaft and secure it using grip tape and solvent. If you’re using a new grip, simply install it as directed.
Safety Considerations:
- Always wear protective eyewear and gloves when using epoxy and heat tools.
- Work in a well-ventilated area when using solvents and adhesives.
Conclusion: Revitalize Your Golf Clubs with Confidence
Reshafting a golf club is a gratifying endeavor that allows you to customize your equipment and breathe new life into your game. By following this step-by-step guide and exercising patience and precision, you can embark on the reshafting journey with confidence. Remember, the key to success lies in careful preparation, attention to detail, and a steady hand. As you grip that newly reshafted club and step onto the course, you’ll not only feel a sense of accomplishment but also a renewed connection to your game.