The Classic Brew: A Step-by-Step Guide to Making Coffee with a Percolator
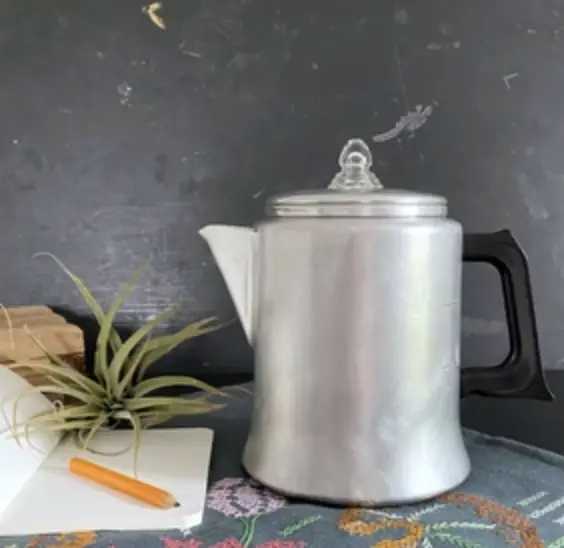
The percolator is a time-tested and beloved method of brewing coffee, known for producing rich, robust flavors that coffee enthusiasts adore. If you’re looking to master the art of percolated coffee, you’re in the right place. In this blog post, we’ll walk you through a step-by-step guide on how to make coffee with a percolator, ensuring a delightful and aromatic cup of joe with every brew.
Step 1: Gather Your Supplies
Before you start brewing, gather all the necessary supplies. You’ll need a percolator, coffee grounds (coarse grind works best), fresh, cold water, and a heat source (stove or campfire).
Step 2: Assemble the Percolator
Assemble the percolator by attaching the coffee basket, spreader plate, and stem to the base. Ensure all components fit securely and are free of any debris from previous uses.
Step 3: Add Water to the Percolator
Measure the desired amount of fresh, cold water into the percolator’s water chamber. It’s essential to use cold water as it will heat more evenly during the brewing process.
Step 4: Insert Coffee Grounds
Place the coffee grounds into the coffee basket, using approximately one tablespoon of coffee grounds for every six ounces of water. Adjust the amount based on your preferred coffee strength.
Step 5: Assemble the Percolator Lid
Place the percolator lid on top, ensuring it fits snugly to prevent any steam or coffee from escaping during the brewing process.
Step 6: Heat the Percolator
Place the percolator on the heat source (stove or campfire) and turn it on to medium heat. Allow the water to heat and start percolating through the coffee grounds.
Step 7: Monitor the Brewing Process
Keep an eye on the percolator as it brews to ensure the water doesn’t boil too rapidly. Ideally, you want a slow, steady percolation process to extract the best flavors from the coffee grounds.
Step 8: Percolate to Perfection
The percolation process typically takes around 7-10 minutes. If you prefer a milder brew, you can remove the percolator from the heat earlier. For a stronger brew, leave it to percolate a bit longer.
Step 9: Remove from Heat and Serve
Once the percolation process is complete, remove the percolator from the heat source and allow it to cool slightly. Carefully pour the brewed coffee into your favorite mug and enjoy the aroma as you savor each sip.
Step 10: Clean the Percolator
After enjoying your coffee, clean the percolator following the steps outlined in our blog post “How to Clean a Percolator.” This ensures that your percolator stays in top-notch condition for future brews.
Conclusion:
Brewing coffee with a percolator is a delightful and rewarding experience that brings out the best flavors of your coffee grounds. With this step-by-step guide, you’re well on your way to mastering the art of percolated coffee. Remember to use fresh, cold water, the right coffee-to-water ratio, and adjust the brewing time to your taste preferences. Each cup of percolated coffee is a celebration of tradition, taste, and the joy of sipping on a classic brew. So, fire up your percolator, inhale the enticing aroma, and relish the rich, flavorful cup of coffee that awaits you! Happy percolating!


